Introduction
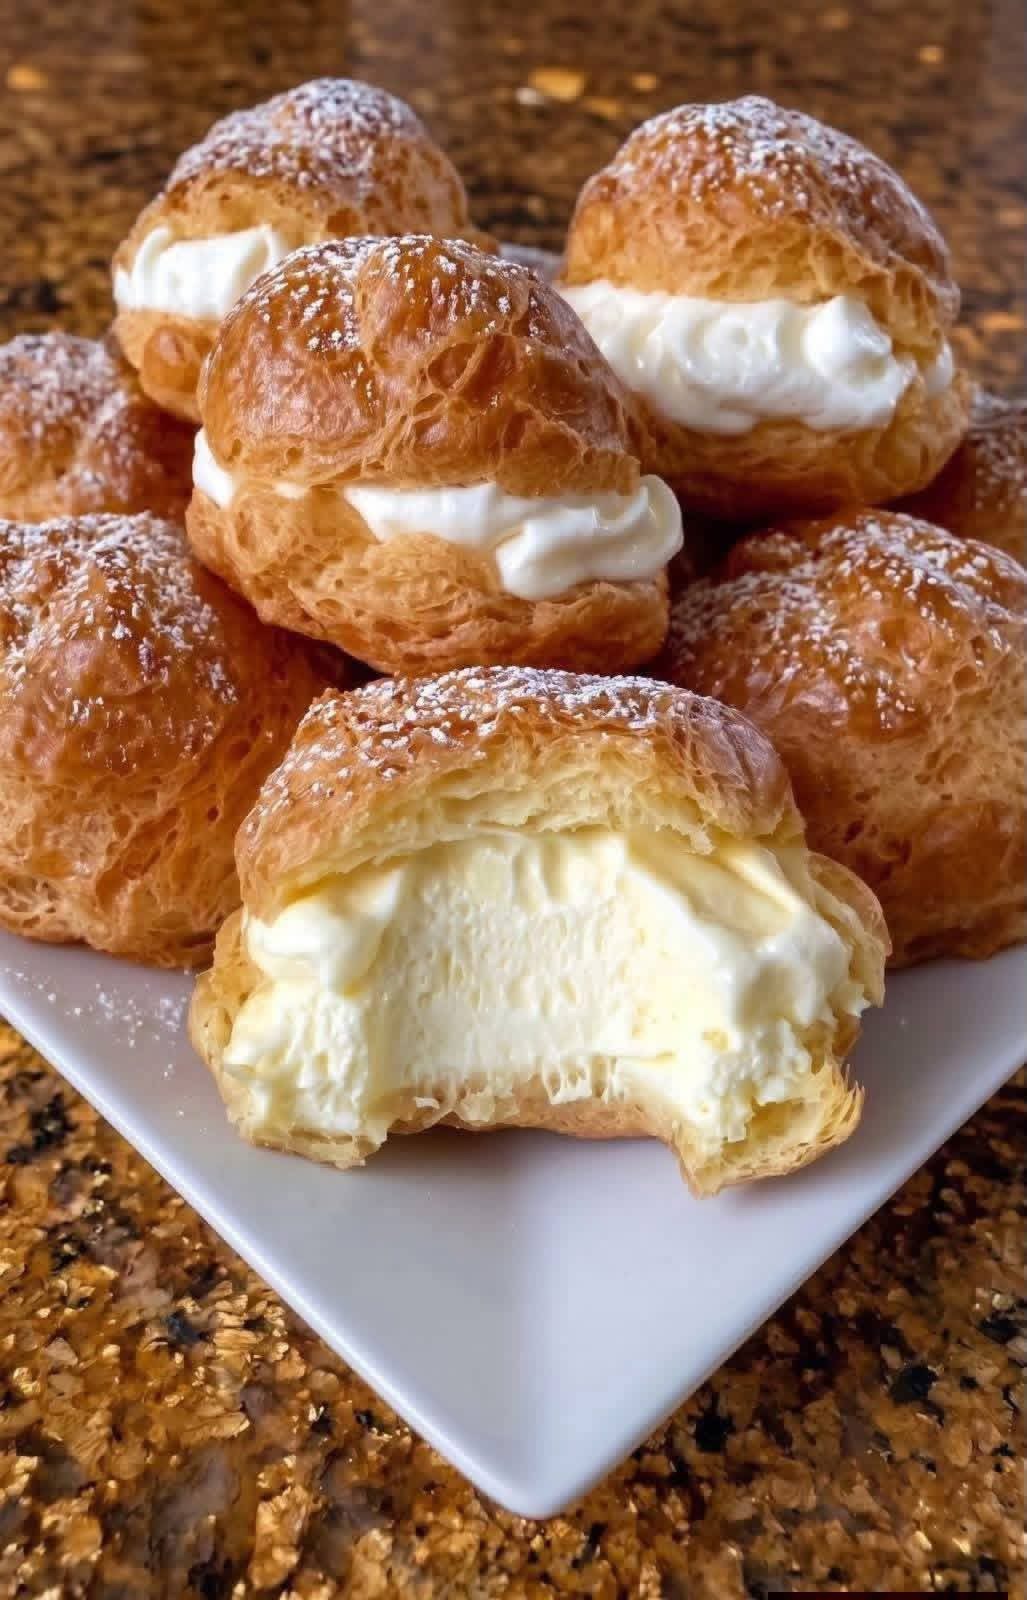
Classic Vanilla Cream Puffs, also known as Choux à la Crème, are elegant French pastries made with delicate, golden-brown choux pastry shells and a smooth, creamy vanilla filling.
Each pastry is light and airy on the outside, with a hollow center generously filled with homemade vanilla diplomat cream. This delicious filling combines silky vanilla pastry cream with lightly sweetened whipped cream, creating a rich yet airy texture that holds its shape beautifully.
Recipe Overview
| Detail | Information |
| Prep Time | 35 minutes |
| Bake Time | 30–33 minutes |
| Chill Time | 1 hour 30 minutes |
| Total Time | Approximately 2 hours 35 minutes |
| Servings | 12 cream puffs |
| Course | Dessert, Pastry |
| Cuisine | French |
| Difficulty | Moderate |
| Calories | Approximately 265 kcal per puff |
Why You’ll Love This Recipe
Light and airy pastry: The choux shells puff beautifully in the oven, creating hollow centers perfect for filling.
Rich vanilla flavor: Homemade pastry cream made with egg yolks, milk, butter, and pure vanilla creates a delicious filling.
Beautiful bakery-style texture: Folding whipped cream into pastry cream creates a light and silky diplomat cream.
Simple ingredients: You only need basic baking ingredients to make these elegant French pastries.
Perfect for special occasions: Cream puffs look impressive on dessert tables and pastry platters.
Make-ahead friendly: The pastry shells and vanilla filling can be prepared separately in advance.
Customizable: You can add chocolate, coffee, fruit, or caramel flavors to create different variations.
Ingredients
Vanilla Diplomat Cream Filling
| Ingredient | Measurement | Notes |
| Whole milk | 1 cup (240 ml) | Full-fat milk gives the best texture |
| Granulated sugar | ⅓ cup (65 g) | Divided |
| Egg yolks | 3 large | Preferably room temperature |
| Cornstarch | 2 tbsp (16 g) | Sifted |
| Fine sea salt | ⅛ tsp | Enhances the flavor |
| Unsalted butter | 1 tbsp (14 g) | Cold and cubed |
| Pure vanilla extract | 2 tsp | Divided |
| Heavy whipping cream | 1 cup (240 ml) | Cold, preferably 35% fat or higher |
| Powdered sugar | 2 tbsp (15 g) | Plus extra for dusting |
Choux Pastry Shells
| Ingredient | Measurement | Notes |
| Water | ½ cup (120 ml) | Tap or filtered |
| Whole milk | ½ cup (120 ml) | Adds richness and browning |
| Unsalted butter | ½ cup (113 g) | Cut into pieces |
| Granulated sugar | 1 tbsp (12 g) | Helps with browning |
| Fine sea salt | ¼ tsp | Balances the flavor |
| All-purpose flour | 1 cup (125 g) | Sifted |
| Large eggs | 4 | Lightly beaten; add gradually |
Step-by-Step Instructions
Part 1: Make the Vanilla Diplomat Cream
Step 1: Heat the Milk
Pour the whole milk into a medium saucepan. Add half of the granulated sugar and place over medium heat.
Warm the mixture until steaming and small bubbles begin forming around the edges. Avoid allowing the milk to boil vigorously.
Remove from the heat if necessary while preparing the egg mixture.
Step 2: Whisk the Egg Yolks
In a medium heatproof bowl, combine the egg yolks, remaining granulated sugar, cornstarch, and salt.
Whisk for approximately 1–2 minutes until the mixture becomes smooth, slightly pale, and free of visible cornstarch lumps.
Step 3: Temper the Egg Mixture
Slowly drizzle approximately half of the hot milk into the egg yolk mixture while whisking continuously.
This process gradually raises the temperature of the egg yolks and helps prevent them from scrambling.
Pour the tempered mixture back into the saucepan with the remaining milk.
Step 4: Cook Until Thickened
Return the saucepan to medium heat.
Whisk continuously for approximately 2–3 minutes, scraping the bottom and corners of the pan.
The mixture will gradually thicken into a smooth pastry cream. Once it reaches a gentle bubbling point, continue cooking and whisking for approximately 30–60 seconds to ensure the cornstarch is fully cooked.
Remove the saucepan from the heat.
Step 5: Add Butter and Vanilla
Immediately whisk in the cold cubed butter and 1 teaspoon of vanilla extract.
Continue whisking until the butter melts completely and the pastry cream becomes glossy and smooth.
Transfer the cream to a shallow heatproof bowl.
Press plastic wrap directly against the surface to prevent a skin from forming.
Refrigerate for at least 1 hour, or until completely cold.
Step 6: Whip the Heavy Cream
Once the pastry cream is cold, place the heavy whipping cream in a chilled mixing bowl.
Add the powdered sugar and remaining 1 teaspoon of vanilla extract.
Using an electric mixer, beat on medium-high speed until stiff peaks form. The whipped cream should hold its shape without becoming grainy or overwhipped.
Step 7: Make the Diplomat Cream
Remove the chilled pastry cream from the refrigerator and whisk briefly until smooth and creamy.
Gently fold approximately one-third of the whipped cream into the pastry cream to lighten it.
Add the remaining whipped cream in two additions, folding gently with a spatula until fully incorporated.
Avoid vigorous mixing because this can deflate the whipped cream.
Transfer the finished vanilla diplomat cream to a piping bag fitted with a large round or star tip.
Keep refrigerated until ready to assemble.
Part 2: Prepare the Choux Pastry Shells
Step 1: Preheat the Oven
Preheat your oven to 400°F (200°C).
Line a large baking sheet with parchment paper.
Make sure the oven is fully preheated before piping and baking the choux pastry.
Step 2: Heat the Liquid Ingredients
In a medium saucepan, combine the water, whole milk, butter, granulated sugar, and salt.
Place over medium-high heat and bring to a full rolling boil.
Make sure the butter has completely melted before adding the flour.
Step 3: Add the Flour
Remove the saucepan from the heat.
Add all the sifted flour at once.
Immediately stir vigorously with a wooden spoon or sturdy spatula until the flour absorbs the liquid and forms a smooth dough.
Return the saucepan to low heat.
Continue stirring for approximately 1–2 minutes. The dough should pull away from the sides of the pan, form a ball, and leave a thin film on the bottom.
This step removes excess moisture and prepares the dough to absorb the eggs properly.
Step 4: Cool the Dough Slightly
Transfer the dough to a large mixing bowl or the bowl of a stand mixer.
Let it cool for approximately 3–4 minutes, stirring occasionally to release steam.
The dough should still be warm but not hot enough to scramble the eggs.
Step 5: Incorporate the Eggs
Lightly beat the eggs in a separate bowl.
Add the beaten eggs gradually, mixing thoroughly after each addition.
At first, the dough may look slippery or separated. Continue mixing until the egg is absorbed before adding more.
The finished dough should be smooth, glossy, and thick.
To check the consistency, lift the spoon or paddle. The dough should fall slowly, forming a thick V-shaped ribbon.
You may not need all four eggs, depending on the flour and moisture content. Stop adding egg when the correct consistency is reached.
Step 6: Pipe the Cream Puffs
Transfer the choux dough into a piping bag fitted with a ½-inch round tip.
Pipe 12 mounds onto the prepared baking sheet, approximately 2 inches wide and 2 inches apart.
Keep the piping bag vertical and apply even pressure to create rounded shapes.
If small pointed peaks form on top, gently smooth them with a fingertip dipped in water.
Try to keep all the puffs similar in size so they bake evenly.
Step 7: Bake the Choux Pastry
Place the baking sheet in the preheated oven.
Bake at 400°F (200°C) for 15 minutes, until the puffs have risen and begun to turn golden.
Without opening the oven door, reduce the temperature to 350°F (175°C).
Continue baking for another 15–18 minutes, until the shells are deep golden brown, firm, and crisp.
Avoid opening the oven during the initial baking stage because the escaping steam can cause the pastry to collapse.
Step 8: Dry the Pastry Shells
Turn off the oven.
Carefully open the oven door slightly and allow some heat to escape.
Using a small paring knife, make a small slit in the side of each puff to release trapped steam.
Return the baking sheet to the warm oven and leave the door slightly open for approximately 10 minutes.
This final drying step helps prevent soggy interiors.
Remove the shells and transfer them to a wire rack.
Allow them to cool completely before filling.
Part 3: Assemble the Cream Puffs
Step 1: Prepare the Pastry Shells
Once the shells are completely cool, use a serrated knife to slice each puff horizontally through the middle.
Keep the top and bottom halves together so they are easy to assemble.
Step 2: Fill With Vanilla Diplomat Cream
Remove the chilled diplomat cream from the refrigerator.
Pipe a generous swirl of vanilla cream onto the bottom half of each pastry shell.
Use a star tip for a decorative bakery-style appearance or a round tip for a smooth, generous filling.
Step 3: Add the Tops
Place the top half of each pastry shell gently over the cream.
Press very lightly so the filling remains visible around the edges.
Step 4: Finish and Serve
Arrange the cream puffs on a serving platter.
Dust generously with powdered sugar just before serving.
For the best texture, serve chilled or slightly cool while the pastry is still crisp and the vanilla cream is light and creamy.
Best Tips for Perfect Cream Puffs
Measure the flour accurately: Too much flour can create dense pastry shells. Use a kitchen scale whenever possible.
Bring the liquids to a full boil: The butter must melt completely before the flour is added.
Cook the flour mixture properly: Stirring the dough over low heat removes excess moisture and helps create the right structure.
Add eggs gradually: Never assume all four eggs are needed. The final dough consistency is more important than the exact quantity.
Look for the V shape: Properly prepared choux dough should fall slowly from a spoon or paddle in a thick V-shaped ribbon.
Pipe evenly: Similar-sized portions bake more consistently.
Don’t open the oven early: Escaping steam can cause the puffs to collapse.
Bake until deeply golden: Pale shells often contain too much moisture and may deflate after cooling.
Dry the shells: Releasing steam and allowing the shells to dry in the warm oven helps keep them crisp.
Cool completely before filling: Warm pastry can melt the whipped cream and soften the filling.
Keep the diplomat cream cold: Refrigeration helps maintain its smooth texture and shape.
Best Ingredient Options
| Ingredient | Best Options | What It Does |
| Whole milk | Full-fat milk | Creates a rich pastry cream |
| Vanilla | Pure vanilla extract or vanilla bean paste | Adds classic vanilla flavor |
| Butter | Unsalted butter | Provides richness and flavor |
| Flour | All-purpose flour | Creates the choux pastry structure |
| Eggs | Large eggs | Help the pastry rise and form a hollow center |
| Heavy cream | 35–40% fat whipping cream | Creates an airy diplomat cream |
| Cornstarch | Regular cornstarch | Thickens the pastry cream |
| Sugar | Granulated and powdered sugar | Sweetens the filling and balances the pastry |
Recipe Variations
1. Chocolate Cream Puffs
Replace the vanilla diplomat cream with chocolate diplomat cream.
Whisk 3–4 ounces of finely chopped semisweet chocolate into the hot pastry cream after removing it from the heat. Once completely chilled, fold in the whipped cream as directed.
Finish with a drizzle of melted chocolate.
2. Strawberry Cream Puffs
Add ½ cup of finely chopped fresh strawberries to the vanilla diplomat cream.
Fold them in gently just before piping. Make sure the strawberries are patted dry to prevent excess moisture from thinning the filling.
3. Coffee Cream Puffs
Dissolve 1–2 teaspoons of instant espresso powder in the warm milk before preparing the pastry cream.
Continue with the recipe as written for a delicious coffee-flavored filling.
4. Lemon Vanilla Cream Puffs
Add 1–2 teaspoons of finely grated lemon zest to the pastry cream while it is still warm.
The citrus aroma creates a refreshing contrast to the rich whipped cream.
5. Caramel Cream Puffs
Fill the pastry shells with vanilla diplomat cream and drizzle homemade caramel sauce over the tops.
Add a small pinch of flaky sea salt for a delicious salted caramel variation.
6. Raspberry Cream Puffs
Add a small spoonful of thick raspberry jam or raspberry compote inside each shell before piping in the vanilla diplomat cream.
Finish with powdered sugar and fresh raspberries.
7. Mini Vanilla Cream Puffs
Pipe smaller mounds, approximately 1–1½ inches wide, instead of the larger 2-inch portions.
Reduce the baking time slightly and watch closely until the shells are golden and crisp.
What to Serve With
Classic vanilla cream puffs are delicious on their own, but they also pair beautifully with other desserts and drinks.
- Fresh berries: Strawberries, raspberries, and blueberries add freshness.
- Chocolate sauce: A rich chocolate drizzle complements the vanilla filling.
- Caramel sauce: Adds a sweet, buttery finish.
- Fresh fruit salad: Balances the richness of the pastry cream.
- Coffee or espresso: A wonderful pairing for afternoon dessert.
- Hot chocolate: Perfect for colder days and holiday gatherings.
- Vanilla latte: Enhances the delicate vanilla flavor.
- Dessert platter: Combine cream puffs with éclairs, macarons, and small tarts for an elegant pastry selection.
Make-Ahead Instructions
Cream puffs are an excellent make-ahead dessert when the pastry shells and filling are prepared separately.
Prepare the diplomat cream: Make the pastry cream, cover it directly with plastic wrap, and refrigerate for up to 2 days. For the best texture, fold in the freshly whipped cream on the day of serving.
Bake the pastry shells: Prepare and bake the choux shells up to 1 day in advance. Once completely cooled, store them in an airtight container at room temperature.
Assemble before serving: Pipe the chilled diplomat cream into the shells shortly before serving. This helps preserve the crisp texture of the pastry.
For special occasions, prepare the components in advance and assemble the cream puffs shortly before guests arrive.
Storage
Filled Cream Puffs
Place assembled cream puffs in a single layer inside an airtight container.
Refrigerate at 40°F (4°C) or below for up to 2 days.
The pastry shells will gradually soften as they absorb moisture from the diplomat cream, so they are best enjoyed on the day they are filled.
Because the filling contains dairy and eggs, do not leave filled cream puffs at room temperature for more than 2 hours.
Unfilled Pastry Shells
Store completely cooled, unfilled choux shells in an airtight container at room temperature for up to 24 hours.
Keep them away from humidity, which can make the shells lose their crispness.
Vanilla Diplomat Cream
Keep the finished diplomat cream refrigerated in an airtight container for up to 2 days.
For the best piping consistency, keep it chilled until assembly.
Reheating and Re-Crisping
Filled cream puffs should not be reheated because the whipped cream filling can melt and lose its structure.
However, unfilled pastry shells can easily be re-crisped.
Oven Method:
- Preheat the oven to 350°F (175°C).
- Arrange the unfilled shells on a baking sheet.
- Bake for 5–6 minutes until crisp.
- Remove and cool completely on a wire rack.
- Fill only after the shells have returned to room temperature.
If the shells were frozen, allow them to thaw before re-crisping.
Freezing
Unfilled choux pastry shells freeze very well and are convenient for preparing desserts in advance.
How to Freeze Unfilled Shells
- Bake the pastry shells until completely golden and dry.
- Allow them to cool completely.
- Arrange them in a single layer on a baking sheet.
- Freeze until firm.
- Transfer to a freezer-safe airtight container or bag.
- Label and freeze for up to 2 months for the best quality.
How to Use Frozen Shells
Remove the shells from the freezer and allow them to thaw.
Place them in a preheated 350°F (175°C) oven for approximately 5–8 minutes to restore their crispness.
Cool completely before piping in the vanilla diplomat cream.
Can You Freeze Filled Cream Puffs?
Freezing filled cream puffs is not recommended for the best texture. The whipped cream filling may become grainy or release moisture after thawing, and the pastry shells can become soggy.
For the best bakery-style results, freeze the unfilled shells and prepare the filling separately.
Common Mistakes to Avoid
1. Opening the Oven Door Too Early
Choux pastry relies on steam to rise and create its hollow center. Opening the oven during the initial baking stage can cause the shells to collapse.
Keep the oven door closed until the pastry has expanded and developed enough structure.
2. Adding Too Much Egg
Excess egg makes the dough too loose, causing the pastry to spread rather than rise properly.
Add the eggs gradually and stop when the dough forms a thick V-shaped ribbon.
3. Not Cooking the Flour Mixture Long Enough
If the panade contains too much moisture, the pastry may not hold its shape.
Cook the dough over low heat for 1–2 minutes, stirring constantly, until it pulls away from the pan.
4. Baking the Shells for Too Little Time
Underbaked shells may look beautiful in the oven but collapse once removed.
Bake until they are deeply golden and feel firm to the touch.
5. Skipping the Drying Step
Steam trapped inside the pastry can make the shells soggy.
Pierce the puffs and allow them to dry in the warm oven before cooling.
6. Filling Warm Pastry Shells
Warm shells can melt the diplomat cream and cause the filling to become runny.
Always allow the shells to cool completely before assembling.
7. Overwhipping the Heavy Cream
Overwhipped cream can become grainy and difficult to fold smoothly into the pastry cream.
Stop mixing as soon as stiff peaks form.
8. Folding Too Aggressively
Vigorous mixing can deflate the whipped cream and make the diplomat cream less airy.
Use a spatula and gently fold until the mixture is evenly combined.
Nutrition Estimate
Approximate nutritional values per cream puff, based on 12 servings.
| Nutrient | Amount |
| Calories | 265 kcal |
| Carbohydrates | 18 g |
| Protein | 5 g |
| Total Fat | 19 g |
| Saturated Fat | 11 g |
| Sugar | 9 g |
| Sodium | 85 mg |
| Fiber | 0.5 g |
Nutrition values are estimates and may vary depending on ingredient brands, the amount of filling used, and the size of the pastry shells.
Frequently Asked Questions
1. Can I fill cream puffs without slicing them in half?
Yes! Use a small round piping tip to make a hole in the bottom or side of each completely cooled pastry shell.
Insert the piping tip and gently squeeze the diplomat cream into the hollow center until the puff feels pleasantly heavy.
This method creates a traditional filled cream puff with no visible filling from the outside.
2. Why did my cream puffs deflate after baking?
Cream puffs usually deflate when their interiors contain too much moisture or the pastry hasn’t baked long enough.
Bake until the shells are deeply golden and firm. Pierce them to release steam and allow them to dry in the warm oven for approximately 10 minutes.
3. Can I use instant pudding instead of homemade pastry cream?
Yes. Instant vanilla pudding can be used as a quicker alternative.
However, homemade vanilla pastry cream provides a richer flavor and more traditional French pastry texture.
For a lighter filling, fold chilled pudding with freshly whipped cream.
4. Can I use regular whipped cream instead of diplomat cream?
Absolutely. Sweetened whipped cream works as a lighter, quicker filling.
For better stability, you can fold 2 tablespoons of mascarpone or softened cream cheese into the whipped cream.
However, diplomat cream provides the classic combination of rich pastry cream and airy whipped cream.
5. Why didn’t my choux pastry rise?
Several factors can prevent choux pastry from rising properly:
- The liquid mixture wasn’t brought to a full boil.
- The flour mixture wasn’t cooked long enough.
- Too much egg was added.
- The oven wasn’t fully preheated.
- The oven door was opened too early.
Following the cooking and egg-incorporation steps carefully will help create properly risen shells.
6. How do I know when choux pastry dough is ready?
The finished dough should be smooth, glossy, and thick enough to hold its shape when piped.
When lifted with a spoon or paddle, it should fall slowly in a thick V-shaped ribbon.
If it is too stiff, add a little more beaten egg. If it becomes too runny, it may be difficult to correct, which is why gradual egg addition is essential.
7. Can I make the pastry shells ahead of time?
Yes. Bake the shells a day ahead and store them in an airtight container once completely cooled.
Before filling, re-crisp them in a 350°F (175°C) oven for 5–6 minutes and allow them to cool completely.
8. Can I make the diplomat cream ahead of time?
Yes. The finished diplomat cream can be refrigerated in an airtight container for up to 2 days.
Keep it chilled and give it a gentle stir before transferring it to a piping bag if needed.
9. Why is my vanilla diplomat cream runny?
Runny diplomat cream can result from pastry cream that hasn’t thickened sufficiently, whipped cream that wasn’t beaten enough, or folding while the pastry cream was still warm.
Make sure the pastry cream is completely cold and the heavy cream reaches stiff peaks before combining them.
10. Can I make mini cream puffs?
Yes! Pipe smaller portions of choux dough and reduce the baking time.
Mini cream puffs are perfect for dessert platters, parties, and special occasions.
11. Can I add chocolate to the pastry shells?
Yes. You can drizzle melted dark, milk, or white chocolate over the filled cream puffs.
Allow the chocolate to set slightly before serving for an elegant bakery-style finish.
12. How long do filled cream puffs last?
Filled cream puffs can be refrigerated for up to 2 days in an airtight container.
For the best crispness and flavor, enjoy them within the first 24 hours after filling.
Final Thoughts
Classic Vanilla Cream Puffs are one of the most beautiful and delicious homemade French desserts. Their light, golden choux pastry shells and rich, airy vanilla diplomat cream create the perfect balance of textures and flavors. Finished with a delicate dusting of powdered sugar, they look elegant enough for special occasions while remaining simple enough to make in your own kitchen.
The secret to perfect cream puffs is taking your time with the choux dough, adding the eggs gradually, baking the shells until deeply golden, and allowing everything to cool completely before assembling. Once you master these simple techniques, you’ll have a wonderful homemade pastry recipe to enjoy, share, and make again and again.