Introduction
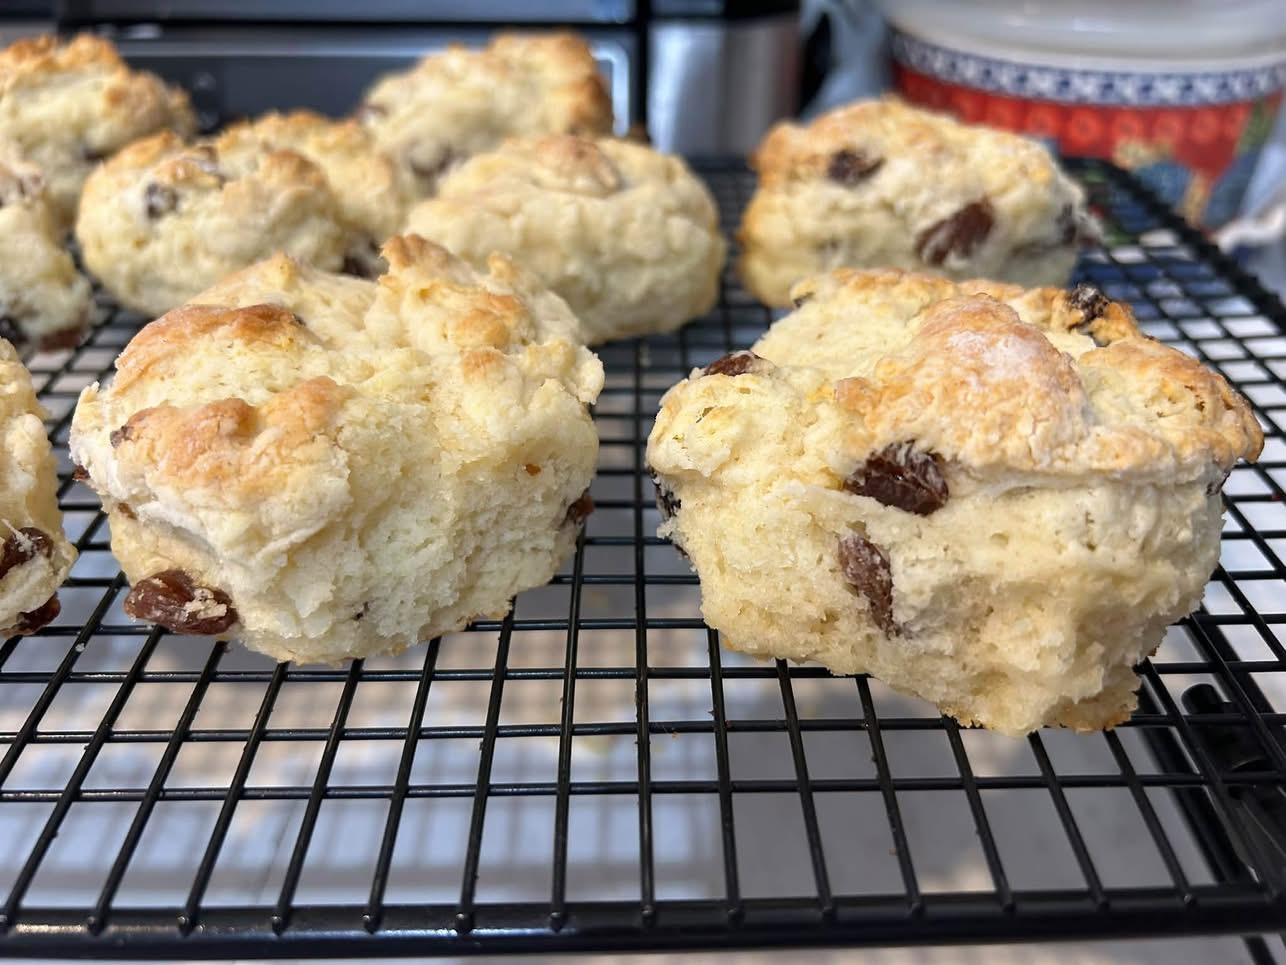
These Rustic Raisin Scones are a delicious homemade treat with a golden exterior, a tender, crumbly center, and sweet raisins tucked into every bite. Made with simple pantry ingredients, cold margarine, fresh milk, and a touch of lemon juice, these traditional-style scones are easy to prepare and bake in just 16 minutes. Their lightly sweet flavor and satisfying texture make them perfect for breakfast, afternoon tea, or a cozy weekend baking session.
Whether you serve them warm with butter, fruit jam, or a drizzle of honey, these easy raisin scones bring comforting homemade goodness to your table. The dough comes together quickly without a mixer, making this recipe ideal for beginner bakers and anyone looking for a simple alternative to store-bought pastries. Enjoy them fresh from the oven with a cup of tea or coffee, or save a few for a quick breakfast throughout the week.
📋 Recipe Overview
| Recipe Detail | Information |
| Prep Time | 15 minutes |
| Bake Time | 16 minutes |
| Total Time | Approximately 31 minutes |
| Oven Temperature | 400°F (200°C) |
| Yield | Approximately 10–12 scones |
| Difficulty | Easy |
| Texture | Golden outside, tender inside |
| Main Ingredients | Flour, margarine, milk, egg, and raisins |
| Best For | Breakfast, brunch, afternoon tea, and snacks |
❤️ Why You’ll Love These Rustic Raisin Scones
1. Simple Pantry Ingredients
You only need a handful of everyday ingredients to make a delicious batch of homemade scones.
2. Quick Baking Time
These scones bake in approximately 16 minutes, making them a convenient choice when you want freshly baked treats without spending hours in the kitchen.
3. Perfectly Sweet
The sugar can be adjusted to your preference. Use ¼ cup for a lightly sweet scone or ½ cup for a sweeter breakfast pastry.
4. Tender, Crumbly Texture
Cold margarine creates small pockets of fat throughout the dough, helping the scones develop a tender texture.
5. Plenty of Raisins
Raisins add natural sweetness and chewy texture to every bite.
6. Easy to Customize
You can add cinnamon, orange zest, chopped nuts, or other dried fruit to create your own variation.
🛒 Ingredients
For the Scone Dough
| Ingredient | Quantity | Purpose |
| All-purpose flour | 3 cups (approximately 375 g) | Forms the structure |
| Granulated sugar | ¼–½ cup (50–100 g) | Adds sweetness |
| Baking powder | 4 teaspoons | Helps the scones rise |
| Cold margarine | ½ cup (113 g) | Creates a tender, crumbly texture |
| Fresh milk | 1 cup (240 ml) | Moistens the dough |
| Large egg | 1 | Adds richness and structure |
| Lemon juice | 1–2 teaspoons | Adds a slight tang |
| Raisins | ¾–1 cup (110–150 g), or to taste | Adds sweetness and chewy texture |
| Extra milk | 1–2 tablespoons, if needed | Helps bring dry dough together |
Ingredient note: The original recipe gives approximate quantities. The measurements above provide a practical starting point; flour absorption and raisin quantity can affect the final dough consistency.
👩🍳 Step-by-Step Instructions
Step 1: Prepare the Oven
- Preheat your conventional oven to 400°F (200°C).
- Line a large baking sheet with parchment paper.
- Measure all the ingredients before starting.
- Keep the margarine cold until you are ready to mix it into the flour.
A properly preheated oven helps the scones rise quickly and develop a golden crust.
Step 2: Prepare the Milk and Egg Mixture
- Pour 1 cup of fresh milk into a small bowl or measuring jug.
- Add one large egg and 1–2 teaspoons of lemon juice.
- Whisk until the egg is fully incorporated.
- Let the mixture stand for approximately 2–3 minutes while you prepare the dry ingredients.
The lemon juice adds a mild tang. Because the milk and lemon mixture is not a substitute for a fully developed sourdough or cultured buttermilk, there is no need to leave it standing for a long time.
Step 3: Combine the Dry Ingredients
- Add the flour to a large mixing bowl.
- Stir in the sugar and baking powder.
- Whisk thoroughly to distribute the baking powder evenly.
- Break up any large flour lumps.
If you prefer lightly sweet scones, use ¼ cup of sugar. For a sweeter batch to serve with tea or coffee, use ½ cup.
Step 4: Cut in the Cold Margarine
- Cut the cold margarine into small cubes.
- Add it to the flour mixture.
- Use your fingertips, a pastry cutter, or two forks to work the margarine into the flour.
- Stop when the mixture resembles coarse breadcrumbs, with a few small pieces of margarine still visible.
Avoid melting the margarine before adding it. Keeping it cold helps produce a tender, rustic texture.
Step 5: Add the Raisins
- Add ¾–1 cup of raisins to the flour mixture.
- Toss gently until the raisins are distributed throughout the mixture.
- Separate any raisins that are clumped together.
If your raisins are especially dry, soak them in warm water for 5–10 minutes, then drain and pat them completely dry before adding them.
Step 6: Bring the Dough Together
- Make a small well in the center of the flour mixture.
- Pour in most of the milk-and-egg mixture.
- Stir gently with a wooden spoon or spatula until the ingredients begin to form a dough.
- Add the remaining liquid gradually, stopping when the dough holds together.
- If the mixture seems too dry, add extra milk 1 teaspoon at a time.
The dough should be soft and slightly tacky but not wet or runny.
Important: Do not knead the dough like bread. Overworking it can develop excess gluten and make the scones tough.
Step 7: Shape the Scones
You can shape these rustic scones in either of two easy ways.
Option A: Round scones
- Lightly flour your work surface.
- Turn the dough out onto the surface.
- Gently pat it into a round approximately ¾–1 inch thick.
- Use a round biscuit cutter to cut out scones.
- Press the cutter straight down rather than twisting it.
Option B: Rustic wedges
- Gently shape the dough into a round approximately ¾–1 inch thick.
- Cut it into 8–10 wedges using a sharp knife.
- Transfer the wedges to the prepared baking sheet.
Arrange the scones with a little space between them to allow for expansion.
Step 8: Bake Until Golden
- Place the baking sheet on the middle rack of the preheated oven.
- Bake for approximately 16 minutes.
- Check that the tops are lightly golden and the edges are set.
- If the scones are still pale or doughy in the center, bake for another 2–4 minutes, checking frequently.
Smaller scones may finish sooner, while larger or thicker portions may require additional time.
For the most reliable doneness check, break open one scone after baking. The center should be cooked through without a wet or gummy appearance.
Step 9: Cool and Serve
- Remove the baking sheet from the oven.
- Allow the scones to rest on the tray for 3–5 minutes.
- Transfer them to a wire rack.
- Serve warm or allow them to cool completely.
For a simple finishing touch, brush the tops lightly with melted butter or serve with jam and butter on the side.
⭐ Best Tips for Perfect Raisin Scones
Keep the Margarine Cold
Cold margarine helps create a tender texture. If it becomes too soft while mixing, refrigerate the mixture for 10 minutes before shaping.
Measure the Flour Correctly
Too much flour can produce dry, dense scones. For the best accuracy, weigh approximately 375 g of all-purpose flour. If using measuring cups, spoon the flour into the cups and level them rather than packing it down.
Avoid Overmixing
Mix only until the dough comes together. A slightly rough appearance is perfectly fine for rustic scones.
Add the Liquid Gradually
You may not need every drop of the milk-and-egg mixture. Stop when the dough is soft and holds together.
Use Fresh Baking Powder
Old baking powder may not provide enough lift, leaving the scones flat and dense.
Don’t Skip the Preheating
A fully heated oven encourages the scones to rise and brown properly.
Watch the Baking Time
Sixteen minutes is a useful starting point, but the exact time depends on the size and thickness of the scones and your oven.
Let Them Rest Briefly
A few minutes of cooling makes the scones easier to handle without allowing them to become completely cold.
🌟 Best Ingredient Options
| Ingredient | Alternative | Result |
| All-purpose flour | Self-raising flour, with the baking powder adjusted or omitted | Convenient alternative |
| Margarine | Cold unsalted butter | Richer buttery flavor |
| Fresh milk | Buttermilk | Slightly tangy flavor |
| Granulated sugar | Light brown sugar | Subtle caramel notes |
| Raisins | Sultanas or golden raisins | Milder, fruity sweetness |
| Lemon juice | Orange juice | Gentle citrus flavor |
| Whole milk | Reduced-fat milk | Slightly lighter texture |
Important: If using self-raising flour, check its ingredients before adding the full 4 teaspoons of baking powder. Too much raising agent can cause an unpleasant taste or uneven rise.
🔄 Recipe Variations
1. Cinnamon Raisin Scones
Add 1 teaspoon of ground cinnamon to the dry ingredients for a warm, fragrant flavor.
2. Orange Raisin Scones
Add 1 teaspoon of finely grated orange zest to the milk-and-egg mixture. Orange pairs beautifully with raisins.
3. Raisin and Walnut Scones
Add ¼ cup of finely chopped walnuts for extra crunch.
4. Brown Sugar Raisin Scones
Replace the white sugar with light brown sugar for a gentle caramel flavor.
5. Vanilla Raisin Scones
Add 1 teaspoon of vanilla extract to the wet ingredients for a sweeter bakery-style aroma.
6. Buttermilk Raisin Scones
Replace the milk with buttermilk for a slightly tangy flavor. Add the liquid gradually because the dough consistency may differ.
7. Mixed Dried Fruit Scones
Replace part of the raisins with chopped dried cranberries, dates, or currants.
8. Lightly Glazed Raisin Scones
Mix ½ cup of powdered sugar with 1–2 tablespoons of milk and drizzle over completely cooled scones.
☕ What to Serve With Rustic Raisin Scones
| Serving Suggestion | Why It Works |
| Salted or unsalted butter | Melts into warm scones |
| Strawberry jam | Adds fruity sweetness |
| Raspberry preserves | Provides a slightly tart contrast |
| Honey | Offers a simple natural sweetness |
| Clotted cream | Creates a traditional afternoon-tea pairing |
| Cream cheese | Adds a smooth, tangy element |
| Hot black tea | Complements the raisins |
| Coffee or cappuccino | Makes a satisfying breakfast pairing |
| Fresh berries | Adds freshness and color |
| Greek yogurt | Provides a creamy, tangy accompaniment |
⏰ Make-Ahead Instructions
You can prepare the dough in advance to make fresh scones easier to enjoy in the morning.
- Prepare the dough according to the instructions.
- Shape the scones and arrange them on a parchment-lined tray.
- Cover loosely and refrigerate for up to 12 hours.
- Bake directly from the refrigerator, allowing a few extra minutes if needed.
Alternatively, mix the dry ingredients ahead of time and refrigerate them separately. Add the cold margarine, raisins, and wet ingredients shortly before baking for the best texture.
🧊 Storage Instructions
Room Temperature
- Allow the scones to cool completely.
- Place them in an airtight container.
- Store at room temperature for up to 2 days for the best texture.
Keep them away from direct sunlight and heat.
Refrigerator
Refrigeration is generally unnecessary for plain raisin scones and may make them dry more quickly. If you need to refrigerate them because of a perishable topping, use an airtight container and allow them to return to a pleasant serving temperature before eating.
❄️ Freezing Instructions
Rustic raisin scones freeze well, making them convenient for quick breakfasts and snacks.
Freezing Baked Scones
- Allow the baked scones to cool completely.
- Wrap each scone individually or arrange them in a freezer-safe container.
- Separate layers with parchment paper.
- Label and freeze for up to 3 months for best quality.
Freezing Unbaked Scones
- Shape the dough into individual scones.
- Arrange them on a tray lined with parchment paper.
- Freeze until solid, approximately 1–2 hours.
- Transfer the frozen scones to a freezer-safe bag or container.
- Bake from frozen at 400°F (200°C), adding approximately 3–6 minutes to the baking time as needed.
Check the centers carefully to ensure they are fully baked.
🔥 Reheating Instructions
Oven Method
- Preheat the oven to 300°F (150°C).
- Place the scones on a baking sheet.
- Warm for approximately 5–8 minutes.
This method helps restore a lightly crisp exterior.
Microwave Method
- Place one scone on a microwave-safe plate.
- Warm for 10–15 seconds.
- Check the temperature and repeat briefly if needed.
Microwaving for too long can make the scones rubbery.
From Frozen
Thaw the scones at room temperature or warm them directly in a 300°F (150°C) oven for approximately 10–15 minutes, depending on their size.
⚠️ Common Mistakes to Avoid
| Mistake | How to Avoid It |
| Dense scones | Avoid overmixing and kneading |
| Dry, crumbly dough | Add milk gradually until the dough holds together |
| Tough texture | Handle the dough gently |
| Flat scones | Check that the baking powder is fresh |
| Uneven baking | Shape the portions to a similar thickness |
| Burnt bottoms | Use parchment paper and bake on the middle rack |
| Pale tops | Check that the oven is fully preheated |
| Dry raisins | Soak briefly if needed, then drain and dry thoroughly |
| Excessively sweet scones | Use ¼ cup sugar and adjust to taste |
| Scones that crumble excessively | Make sure enough liquid is incorporated |
| Undercooked centers | Bake larger portions for a little longer and check the middle |
| Tough, overworked dough | Mix only until the ingredients come together |
📊 Nutrition Estimate
The following nutrition values are approximate and will vary depending on the amount of sugar, raisins, and margarine used.
| Nutrient | Estimated Amount Per Scone |
| Calories | 220–280 kcal |
| Protein | 4–6 g |
| Total Fat | 7–11 g |
| Saturated Fat | 2–4 g |
| Carbohydrates | 34–42 g |
| Sugars | 8–15 g |
| Fiber | 1–2 g |
| Sodium | 180–300 mg |
These estimates assume a batch of approximately 10–12 medium scones.
❓ Frequently Asked Questions
Why are my raisin scones dense?
Dense scones are often caused by overmixing, too much flour, or baking powder that has lost its effectiveness. Handle the dough gently and measure the ingredients carefully.
Can I use butter instead of margarine?
Yes. Cold unsalted butter works very well and gives the scones a richer flavor. Cut it into small cubes and work it into the flour in the same way.
Can I use self-raising flour?
Yes, but you should adjust or omit the additional baking powder depending on the product’s ingredients. Using the full amount of baking powder with self-raising flour may cause the scones to rise too quickly or taste bitter.
Can I make these scones without an egg?
You can try replacing the egg with approximately 3 tablespoons of additional milk or plain yogurt. The texture may be slightly less rich and more crumbly, so add the liquid gradually.
How do I know when the scones are done?
The tops should be lightly golden, the edges should look set, and the centers should no longer be wet or doughy. Larger scones may need more than 16 minutes.
Can I reduce the sugar?
Absolutely. Use ¼ cup of sugar for lightly sweet scones, especially if you plan to serve them with jam or honey.
Can I use golden raisins?
Yes. Golden raisins, sultanas, and regular raisins are all suitable for this recipe.
Why is lemon juice added to the milk?
Lemon juice adds a mild tang and slightly changes the milk’s acidity. It is not essential to the recipe, but it provides a subtle flavor that works well with the raisins.
Can I prepare the dough the night before?
Yes. Shape the scones, cover them, and refrigerate for up to 12 hours before baking. Bake them directly from the refrigerator, checking for doneness as usual.
How long do homemade raisin scones last?
For the best flavor and texture, store them in an airtight container at room temperature for up to 2 days. Freeze any extras you want to keep longer.
Can I freeze raisin scones?
Yes. Baked or unbaked scones can be frozen for up to 3 months for best quality. Freeze them in airtight packaging to help prevent freezer burn.
What is the best way to serve raisin scones?
Serve them slightly warm with butter, jam, honey, or clotted cream. They are also delicious alongside a cup of tea or coffee.
❤️ Final Thoughts
These Rustic Raisin Scones are a simple, comforting homemade bake that combines a golden crust, a tender crumb, and sweet raisins in every bite. With everyday ingredients and just 16 minutes of baking time, they are a wonderful option for breakfast, afternoon tea, brunch, or a homemade snack.
For the best results, keep the margarine cold, add the milk mixture gradually, and handle the dough as little as possible. Serve the scones warm with butter or your favorite jam, and freeze any extras for another day. Once you discover how easy homemade raisin scones can be, you may find yourself baking them whenever you want something warm, simple, and delicious.