Introduction
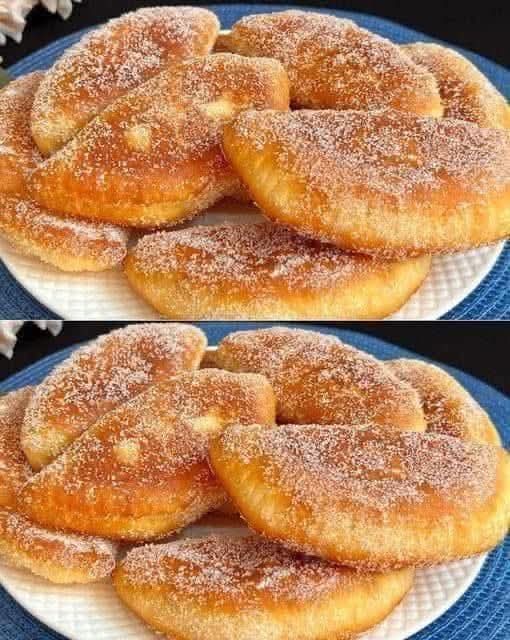
These soft, golden-brown pastries are lightly fried to perfection and coated with a generous layer of sugar, making them a deliciously sweet and irresistible treat. They are perfect for breakfast, as an afternoon snack, or even as a dessert. With a crispy exterior and a soft, pillowy inside, these pastries are sure to be a hit!
Ingredients:
2 cups all-purpose flour (use gluten-free flour if needed)
1/2 cup sugar
1/2 teaspoon salt
1 tablespoon baking powder
2 tablespoons butter (softened)
1/2 cup milk (or dairy-free milk)
1 egg
1 teaspoon vanilla extract
Vegetable oil for frying
1/2 cup sugar (for coating)
1 teaspoon ground cinnamon (optional)
Instructions:
Prepare the Dough: In a large bowl, mix the flour, sugar, salt, and baking powder. Add the softened butter and rub it into the flour until it forms a crumbly texture.
Add Wet Ingredients: In a separate bowl, whisk together the milk, egg, and vanilla extract. Pour this mixture into the flour mixture and stir until a dough forms. If the dough is too sticky, add a little more flour until it’s smooth and manageable.
Roll the Dough: On a lightly floured surface, roll out the dough to about 1/2 inch thickness. Use a round cutter or a glass to cut out circles of dough.
Fry the Pastries: Heat vegetable oil in a large pan or deep fryer over medium heat. Once the oil is hot (about 350°F/175°C), carefully place the dough circles into the hot oil. Fry them for 2-3 minutes on each side or until golden brown and crispy.
Coat with Sugar: Remove the fried pastries from the oil and drain them on a paper towel. While they are still warm, mix the sugar and cinnamon (if using) in a shallow dish. Roll each pastry in the sugar mixture until well coated.
Serve: Let the pastries cool slightly before serving. Enjoy them fresh for the best taste!
These sugar-coated fried pastries are light, crispy, and delicious, perfect for any occasion!
Variations
For a delightful twist, consider adding flavors directly to the dough. A pinch of nutmeg or cardamom can add a warm, aromatic depth, while a tablespoon of lemon or orange zest can provide a bright, citrusy note. You can also incorporate a small handful of raisins or dried currants into the dough before rolling for bursts of fruity sweetness in every bite.
The coating offers another opportunity for customization. While classic cinnamon sugar is always a winner, try rolling the warm pastries in powdered sugar for a snowy effect or a mixture of sugar and a bit of cocoa powder for a chocolatey touch. For a richer flavor, you can even toss them in a glaze made from powdered sugar and a splash of milk or citrus juice instead of the dry sugar coating.
If you prefer a filled version, these pastries are wonderfully adaptable. Before sealing and frying, place a small spoonful of fruit jam, apple pie filling, or even a dollop of sweetened cream cheese or nutella in the center of each dough circle. Fold the dough over to create a half-moon, press the edges firmly with a fork to seal, and fry as directed for a decadent, stuffed treat.
Tips
Achieving the perfect texture starts with the oil temperature. Use a kitchen thermometer to ensure the oil is consistently at 350°F (175°C). If the oil is too cool, the pastries will absorb too much oil and become greasy; if it’s too hot, they will brown too quickly while remaining doughy inside. Frying in small batches is crucial to prevent the oil temperature from dropping drastically.
The dough itself should be soft but not overly sticky. When mixing, stir just until the ingredients come together to avoid developing too much gluten, which can make the pastries tough. If the dough feels too wet when you go to roll it, add flour a tablespoon at a time until it’s smooth and manageable. Conversely, if it’s too dry and crumbly, add a teaspoon more milk.
For a consistently golden and crispy exterior, ensure your pastries are well-drained after frying. Place them on a wire rack set over a baking sheet instead of just paper towels. This method allows air to circulate around them, preventing the bottom from becoming soggy from steam and residual oil. This step is key for maintaining that desirable contrast between the crispy shell and the soft interior.
How to Store
These pastries are truly best enjoyed the day they are made, when their exterior is at its peak crispness. If you have leftovers, allow them to cool completely to room temperature first. Any residual warmth will create condensation and accelerate sogginess. Once cool, place them in a single layer in an airtight container at room temperature, separating layers with parchment paper.
For short-term storage of one to two days, the airtight container at room temperature is sufficient. Be aware that the sugar coating will likely dissolve slightly into the pastry over time, and the crispy texture will soften. To revive them, you can briefly reheat leftovers in a toaster oven or conventional oven at 350°F for a few minutes, which will help restore some crispness.
While not ideal due to the fried nature, you can freeze the pastries for longer storage. Freeze them in a single layer on a baking sheet until solid, then transfer them to a freezer-safe bag or container. To serve, reheat them directly from frozen in a 375°F oven until warmed through. Note that the texture will be more bread-like than crispy after freezing and reheating. They are not recommended for storing in the refrigerator, as it promotes staling and sogginess.
Conclusion
With their irresistible combination of a crispy, sugar-coated shell and a tender, fluffy interior, these fried pastries are a simple yet profoundly satisfying homemade delight. Whether you stick to the classic recipe or explore creative variations, they are guaranteed to bring a touch of homemade warmth and sweetness to any table. Enjoy the process of making them and the joy of sharing these golden, delicious treats.