### **Mini Snacks Recipe**
#### **Introduction**
Mini snacks are the perfect addition to any gathering, whether it’s a party, a casual get-together, or just a cozy night in. These bite-sized treats are not only delicious but also incredibly versatile, allowing you to experiment with flavors and ingredients to suit your taste. Making them at home gives you the freedom to create something unique and tailored to your preferences.
What makes these mini snacks even better is how easy they are to prepare. With just a few simple ingredients and minimal equipment, you can whip up a batch in no time. Whether you’re a seasoned baker or a beginner, this recipe is designed to be straightforward and mess-free, ensuring a fun and enjoyable cooking experience.
#### **Ingredients**
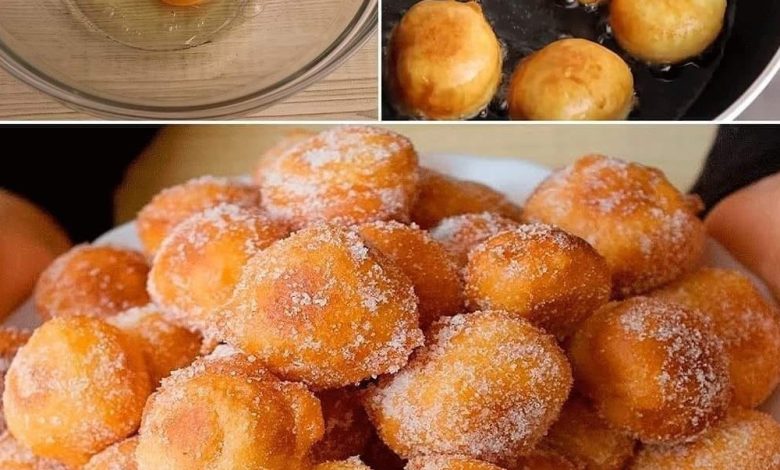
To make these mini snacks, you’ll need a handful of basic ingredients. Start with all-purpose flour, refined sugar, baking powder, and a pinch of salt for the dry mix. For the wet ingredients, gather milk, melted butter, a beaten egg, and vanilla extract. If you’re feeling adventurous, add chopped hazelnuts or other nuts for a crunchy texture.
For the glaze, powdered sugar, milk (or water), and vanilla extract are the key components. You can also prepare toppings like melted chocolate, cinnamon sugar, or sprinkles to add extra flavor and visual appeal. These ingredients are easy to find and can be adjusted based on what you have on hand.
#### **Instructions**
Begin by preparing the dough. Combine the dry ingredients in a large mixing bowl, ensuring they are evenly distributed. In a separate bowl, whisk together the wet ingredients until smooth. Gradually pour the wet mixture into the dry ingredients, stirring gently until just combined. Be careful not to overmix, as this can affect the texture of your mini snacks.
Next, bake the dough. Preheat your oven to 190°C and grease a mini donut pan or small skillet. Spoon the batter into the pan, filling each cavity about three-quarters full. Bake for 8-10 minutes, or until a toothpick inserted into the center comes out clean. Allow the snacks to cool in the pan for a few minutes before transferring them to a wire rack to cool completely.
Finally, prepare the glaze and toppings. Whisk together powdered sugar, milk, and vanilla extract until smooth. Dip or drizzle the cooled mini snacks with the glaze, then add your desired toppings while the glaze is still wet. Let the glaze set for 15-20 minutes before serving.
#### **How to Make**
Making these mini snacks is a simple and enjoyable process. Start by gathering all your ingredients and equipment. Having everything ready before you begin will make the process smoother and more efficient. Mix the dry and wet ingredients separately before combining them to ensure an even distribution of flavors.
When baking, keep an eye on the oven to avoid overcooking. The mini snacks should be golden brown and springy to the touch when done. Cooling them properly is essential to prevent them from becoming soggy. Once cooled, get creative with the glaze and toppings to make each bite unique.
The final step is the most fun—decorating! Whether you prefer a simple glaze or a more elaborate topping, this is your chance to let your creativity shine. The result will be a batch of delicious, eye-catching mini snacks that are sure to impress.
#### **Variations**
One of the best things about this recipe is its versatility. You can easily customize the flavors to suit your preferences. For a chocolate twist, add cocoa powder to the dry ingredients or drizzle melted chocolate over the finished snacks. If you love spices, try adding cinnamon or nutmeg to the batter for a warm, cozy flavor.
For a fruity variation, mix in finely chopped dried fruits like apricots or cranberries. You can also experiment with different glazes, such as lemon or orange, by adding citrus zest and juice to the powdered sugar mixture. The possibilities are endless, so don’t be afraid to get creative.
If you’re looking for a healthier option, substitute some of the all-purpose flour with whole wheat flour or almond flour. You can also reduce the sugar or use a natural sweetener like honey or maple syrup. These adjustments allow you to enjoy the snacks guilt-free while still indulging in their deliciousness.
#### **Tips**
To ensure your mini snacks turn out perfectly, follow these tips. First, make sure your baking powder is fresh, as this will help the snacks rise properly. If the batter seems too thick, add a splash of milk to achieve the right consistency. Conversely, if it’s too runny, add a bit more flour.
When filling the pan, avoid overfilling the cavities, as the batter will expand during baking. Using a piping bag or a small spoon can help you portion the batter evenly. Keep an eye on the oven temperature, as baking times may vary depending on your appliance.
For the glaze, start with a small amount of liquid and gradually add more until you reach the desired consistency. If you’re adding toppings, work quickly while the glaze is still wet to ensure they stick properly. These small details can make a big difference in the final result.
#### **How to Store**
Once your mini snacks are completely cooled, store them in an airtight container at room temperature. They will stay fresh for up to two days. If you need to store them longer, place them in the refrigerator for up to a week.
For longer storage, you can freeze the snacks. Place them in a single layer on a baking sheet and freeze until solid, then transfer them to a freezer-safe bag or container. They can be stored in the freezer for up to three months. To enjoy, simply thaw at room temperature or reheat in the oven for a few minutes.
#### **Conclusion**
These mini snacks are a delightful treat that’s perfect for any occasion. Their small size makes them ideal for sharing, and their customizable nature ensures there’s something for everyone to enjoy. Whether you’re hosting a party or simply treating yourself, these snacks are sure to bring a smile to your face.
Making them at home is not only rewarding but also allows you to experiment with flavors and techniques. With this recipe, you have the foundation to create endless variations, making it a go-to for all your snacking needs. So gather your ingredients, get creative, and enjoy the process of making and sharing these delicious mini snacks!