Introduction
Ice cream holds a timeless appeal, but creating a truly decadent version at home is simpler than many imagine. This recipe bypasses the need for an ice cream maker entirely, relying on a no-churn method that yields an unbelievably rich and creamy texture. The secret lies in a luxurious base of sweetened condensed milk and heavy cream, which is then elevated with a ripple of homemade chocolate truffle ganache.
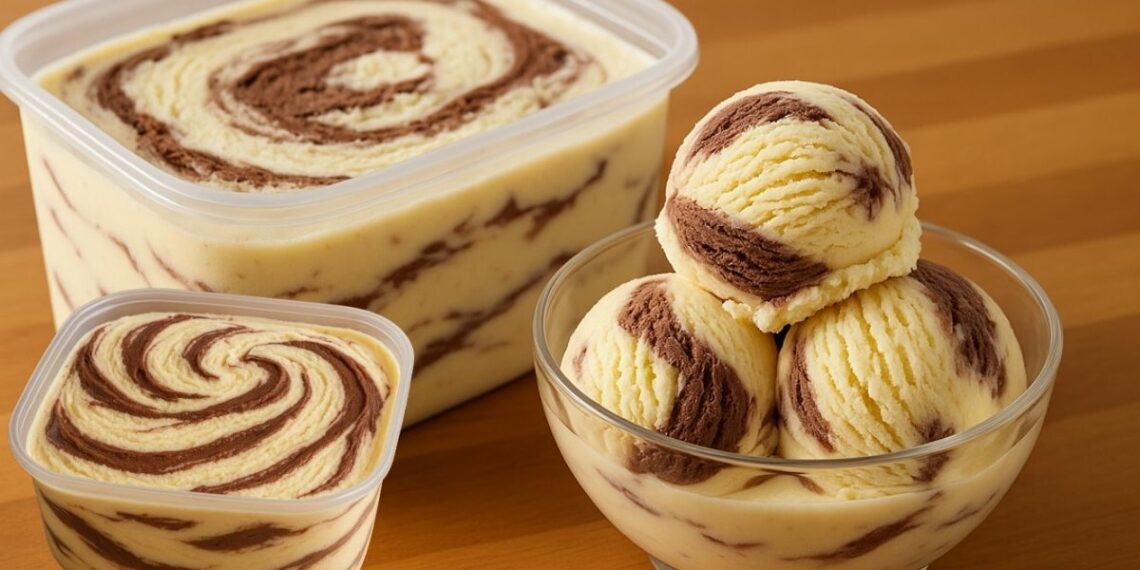
The result is a sophisticated dessert that marries the smooth, cold comfort of premium vanilla ice cream with the deep, velvety intensity of chocolate truffles. This marbled masterpiece is perfect for special occasions or for turning an ordinary day into a celebration. It’s an impressive yet straightforward process, proving that the most indulgent treats can come from your own kitchen.
Ingredients
For the Ice Cream Base:
Sweetened condensed milk,2 cans (approximately 800 g / 28 oz)
Heavy cream,2 cartons (400 g / 14 oz)
Powdered milk,1 cup (100 g / 3.5 oz)
Vanilla extract,1 tablespoon
For the Truffle Ganache:
Semi-sweet or milk chocolate,200 g (7 oz)
Heavy cream,½ carton (100 g / 3.5 oz)
Instructions
Prepare the Ice Cream Base by combining the sweetened condensed milk, heavy cream, powdered milk, and vanilla extract in a blender.
Blend until the mixture is completely smooth and creamy.
Pour this base into a freezer-safe container with a lid and place it in the freezer for two hours.
While the base chills, make the Truffle Ganache.
Melt the chocolate gently using a double boiler or in the microwave using 30-second intervals, stirring well each time to prevent scorching.
Once the chocolate is melted and smooth, add the heavy cream and stir vigorously until the ganache is glossy and uniform.
Set it aside to cool slightly to a thick but pourable consistency.
To assemble, remove the ice cream base from the freezer after its initial two-hour chill. It will be partially set.
Use a spoon or spatula to stir it well, breaking up any formed ice crystals. Spoon or drizzle the cooled truffle ganache over the surface.
Using a knife or the spoon, gently fold and swirl the ganache into the ice cream base just a few times to create a beautiful marbled effect; avoid overmixing.
Cover the container securely and return it to the freezer for at least four more hours, or until the ice cream is completely firm and set. Serve very cold.
Variations
The beauty of this recipe is its adaptability. For a delightful textural contrast, consider folding in add-ins along with the ganache.
Chopped toasted nuts like pecans or hazelnuts, crushed cookies, or brittle would add a wonderful crunch.
For a fruitier twist, a ribbon of raspberry or salted caramel sauce swirled in alongside or in place of the chocolate ganache can create a stunning and delicious contrast.
Chocolate lovers can explore further by altering the ganache itself. Using dark chocolate will create a more intense, bittersweet ripple, while white chocolate ganache offers a creamier, sweeter note.
You could also infuse the cream for the ganache with a flavor like orange zest, mint, or even a pinch of espresso powder before mixing it with the chocolate to layer in sophisticated flavors.
The base itself is a perfect canvas. The vanilla extract can be replaced with other extracts such as almond, coconut, or maple for a different foundational flavor.
For a more pronounced vanilla flavor, you can scrape the seeds from a whole vanilla bean into the base mixture before blending.
The powdered milk can also be substituted with malted milk powder for a classic malted vanilla profile.
Tips
Success hinges on the quality of your cream. Ensure your heavy cream is very cold when you blend the base; this helps incorporate air and stabilize the mixture for a lighter final texture.
When blending, aim for a smooth, thick, and homogeneous mixture, but avoid over-blending to the point where you start to whip the heavy cream into butter.
The ganache consistency is key for perfect swirling. It should be cooled to a thick, pudding-like stage so it ribbons through the base without immediately sinking to the bottom or blending in completely.
If it becomes too thick after cooling, you can gently re-warm it for a few seconds. When marbling, use a deliberate but gentle hand—just a few folds will achieve that artisanal, streaked look.
For the creamiest results, the initial stir at the two-hour mark is crucial. This step breaks up large ice crystals early in the freezing process. If you have the time, you can repeat this stirring once more after another hour or two for an even smoother texture.
Always use a container that is shallow and wide rather than deep and narrow, as this promotes faster, more even freezing.
How to Store
Proper storage is essential for maintaining the ideal texture and preventing freezer burn. Always store the ice cream in an airtight, freezer-safe container.
Press a piece of parchment paper or wax paper directly onto the surface of the ice cream before sealing the lid; this creates an extra barrier against ice crystals forming on top.
A shallow container is preferable to a tall one, as it minimizes the amount of air space above the dessert.
This homemade ice cream is best enjoyed within the first two to three weeks for optimal flavor and creaminess.
While it will remain safe to eat for longer, the texture may become harder and more crystalline over time due to the lack of commercial stabilizers.
The flavors, however, especially the chocolate ganache, will remain potent and delicious.
When serving, allow the container to sit at room temperature for about 5 to 10 minutes to soften slightly for easier scooping.
Always use a clean, dry scoop to portion out the ice cream, and return the container to the freezer immediately after serving.
Avoid repeated thawing and refreezing, as this dramatically increases ice crystal formation.
Conclusion
This no-churn truffle ice cream is a testament to how simple ingredients, when combined thoughtfully, can create a dessert of extraordinary luxury. The process requires minimal effort and no special equipment, yet the payoff is a rich, creamy, and visually stunning treat that rivals any artisanal shop offering. The marbled swirl of homemade ganache not only adds depth of flavor but also makes each scoop a unique delight.
Ultimately, this recipe is an invitation to indulge and to share. It empowers you to create a show-stopping dessert that is sure to impress guests and satisfy the deepest cravings for something sweet and special. So gather your ingredients, embrace the simple steps, and look forward to the moment you scoop into your own homemade masterpiece.