Frozen Fruit Salad: A Classic Vintage Recipe Perfect for Holidays & Summer
Nothing beats a refreshing, sweet, and creamy frozen fruit salad—especially when it’s a cherished recipe passed down through generations. This vintage dessert, straight from Great-Grandma’s recipe box, is a delicious twist on traditional marshmallow fruit salad. It’s easy to make, packed with fruity goodness, and can be enjoyed as a side dish or a light dessert.
With its cool, creamy texture and vibrant fruit flavors, this dish is a staple at our family gatherings. My Aunt Jenny makes it every Easter, Thanksgiving, and Christmas, ensuring that this tradition lives on.
Why You’ll Love This Frozen Fruit Salad
- Effortless Preparation – Just mix, freeze, and enjoy!
- Make-Ahead Friendly – Prepare it a day in advance for stress-free entertaining.
- Refreshing & Creamy – The perfect balance of fruity freshness and smooth richness.
- Ideal for Any Occasion – Serve it for holiday feasts, summer BBQs, or as a light after-dinner treat.
Ingredients & Their Roles
- 8 ounces cream cheese, softened – Adds creaminess and a slight tang that balances the sweetness.
- 2 cups whipped topping (plus more for serving) – Provides an airy, light texture that keeps the salad fluffy.
- 1 pint strawberries, diced – Fresh, juicy berries add natural sweetness and a pop of color.
- 2 large bananas, chopped and diced – Contributes natural creaminess and tropical sweetness.
- 20 ounces crushed pineapple, drained – Offers bright, tangy flavor and moisture without making the dish too watery.
How to Make Frozen Fruit Salad
Step 1: Mix the Base
In a large mixing bowl, combine the softened cream cheese with the diced strawberries. Mix well until the cream cheese is smooth and the strawberries are evenly distributed.
Gently fold in the drained crushed pineapple and the chopped bananas, ensuring they’re evenly coated in the mixture.
Add the whipped topping and carefully fold it in until everything is fully incorporated.
Step 2: Freeze the Dessert
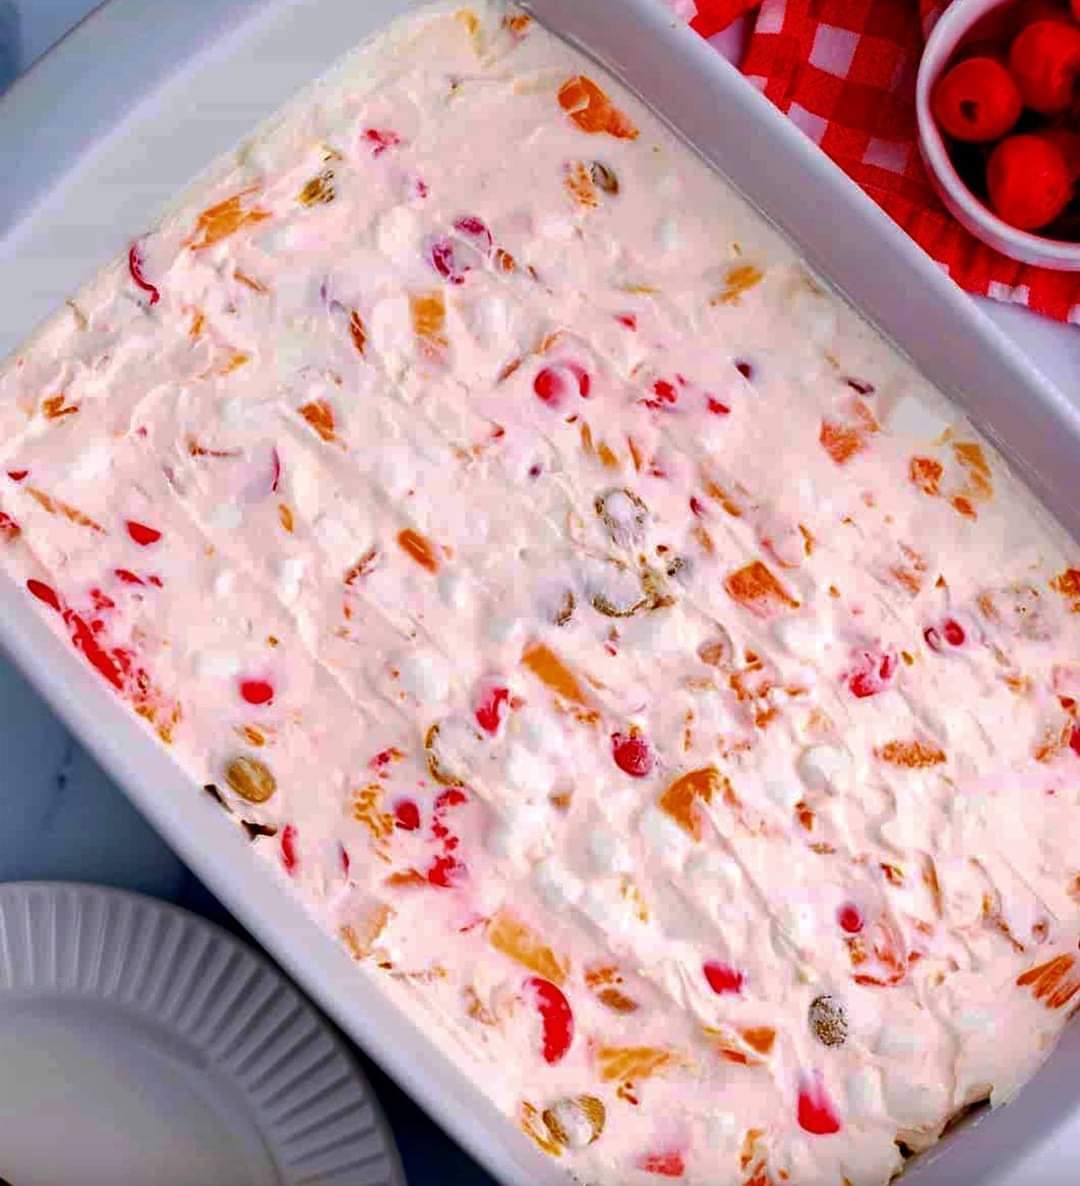
Spread the mixture evenly in a 9×13 baking pan, smoothing the top with a spatula.
Place the dish in the freezer and allow it to set for several hours or overnight until firm.
Step 3: Serve & Enjoy
Before serving, let the frozen fruit salad sit at room temperature for about 10 minutes to make slicing easier.
Dip a sharp knife into hot water before slicing to get clean, neat portions.
Serve with an extra dollop of whipped topping for a decadent touch!
Pro Tips for the Perfect Frozen Fruit Salad
- Use ripe but firm bananas to prevent them from turning mushy after freezing.
- Drain the crushed pineapple thoroughly to avoid excess liquid making the salad icy.
- For added crunch, mix in chopped pecans or walnuts before freezing.
- For a festive touch, add a handful of mini marshmallows or shredded coconut.
- Store leftovers in an airtight container to prevent freezer burn and maintain the best texture.
Serving Suggestions
This frozen fruit salad pairs beautifully with holiday roasts, summer BBQs, or brunch spreads. Serve it alongside grilled chicken, ham, or a fresh fruit platter for a well-balanced meal. It’s also a fantastic light dessert after a heavy main course.
Final Thoughts: A Timeless Family Favorite
This Frozen Fruit Salad isn’t just a dish—it’s a family tradition. Passed down through generations, it remains a beloved favorite at every holiday feast and summer celebration. With its simple preparation, delightful flavors, and make-ahead convenience, this recipe is guaranteed to become a go-to in your household too.
Make it once, and it’ll quickly earn a permanent spot in your family’s recipe collection. Try it today, and experience the perfect balance of creamy, fruity, and refreshing goodness!
Variations
This classic frozen fruit salad is incredibly versatile—feel free to customize it to suit your tastes! For a tropical twist, swap the strawberries for diced mango or kiwi, and add shredded coconut for extra flavor.
If you prefer a tangier version, mix in some Greek yogurt with the cream cheese or add a splash of citrus juice (like orange or lime) to brighten the flavors. For a richer dessert, layer the mixture into a graham cracker crust before freezing, turning it into a refreshing frozen fruit pie.
If you love texture, try folding in extras like mini marshmallows, chopped nuts, or granola for a satisfying crunch. Chocolate lovers can drizzle melted chocolate over the top before serving or mix in mini chocolate chips.
For a lighter option, substitute the whipped topping with freshly whipped cream sweetened with a touch of honey. The possibilities are endless, so don’t be afraid to experiment!
Seasonal adaptations make this recipe a year-round favorite. In the fall, try adding diced apples, pears, or a sprinkle of cinnamon. For winter holidays, cranberries or pomegranate arils add a festive touch.
In the summer, swap in fresh peaches, blueberries, or even watermelon (just pat the fruit dry to avoid excess moisture). No matter the season, this frozen fruit salad can be tailored to highlight the best produce available.
Tips for the Best Frozen Fruit Salad
To ensure your frozen fruit salad turns out perfectly every time, start with fully softened cream cheese—this prevents lumps and ensures a smooth, creamy texture. If you’re short on time, microwave the cream cheese for 10-15 seconds to soften it quickly.
When folding in the whipped topping, use a gentle hand to keep the mixture light and fluffy. Overmixing can deflate the whipped topping, making the salad denser.
Draining the pineapple thoroughly is crucial—excess liquid can make the salad icy instead of creamy. Press the pineapple in a fine-mesh strainer or squeeze it in a clean kitchen towel to remove as much juice as possible.
If using frozen fruit (like berries), thaw and pat them dry before adding to the mix. For the best texture, chop all fruit into uniform, bite-sized pieces so every spoonful is balanced.
For easy serving, line your baking dish with parchment paper before adding the mixture—this allows you to lift out the entire block and slice it neatly. If you prefer individual portions, scoop the mixture into muffin tins or small ramekins before freezing.
To prevent bananas from browning, toss them in a little lemon or pineapple juice before mixing them in. These small steps make a big difference in the final result!
How to Store Frozen Fruit Salad
This dessert is ideal for making ahead, but proper storage is key. Once frozen solid, cover the baking dish tightly with plastic wrap and aluminum foil to prevent freezer burn.
For longer storage (up to 2 weeks), transfer slices to an airtight container, separating layers with parchment paper. If storing individual portions, wrap each piece in plastic wrap before placing them in a freezer bag for easy grab-and-go servings.
When ready to serve, let the salad thaw at room temperature for 10-15 minutes—this softens it just enough for easy slicing without becoming mushy.
If you need to speed up the process, microwave individual slices for 5-10 seconds. Avoid refreezing thawed portions, as this can degrade the texture. Instead, cut only what you plan to serve and keep the rest frozen.
For the best flavor and texture, consume within 1-2 weeks. Over time, ice crystals may form, altering the creamy consistency. If the salad does develop freezer burn, scrape off any affected areas and repurpose the rest into a smoothie or parfait.
With proper storage, this dessert stays fresh and delicious, ready to impress at a moment’s notice!
Conclusion
This Frozen Fruit Salad is more than just a recipe—it’s a celebration of family, tradition, and simple, wholesome flavors. Whether served at a holiday feast, summer picnic, or weeknight dinner, its creamy texture and burst of fruity sweetness make it a crowd-pleaser. The make-ahead convenience means less stress for you and more time enjoying the moment with loved ones.
Give this vintage recipe a try, and it’s sure to become a beloved staple in your home, just as it has been for generations. Share it with friends, adapt it to your tastes, and create new memories around this timeless dish. After all, the best recipes are the ones that bring people together—cool, creamy, and full of joy!